Peace lilies are wonderful house plants for anyone. From beginners with no experience to people with enough plants to stock a nursery, peace lilies deserve a space in your home. First of all, they are one of the best indoor air cleaning plants. Studies by NASA have found peace lilies to remove notable amounts of benzene, formaldehyde, and trichloroethylene (an industrial solvent) from the air. The plant captures these nasty molecules in its leaf pores and sends them to its roots, where microbes change them into less harmful compounds. Peace lilies also produce more oxygen than most house plants. Breathe deep!
On a less technical side, peace lilies are hard to kill. If cared for properly, peace lilies give off striking, cream-colored flowers that last for weeks or even months. So, while it is rather easy to keep a peace lily alive, this guide will help you learn how to make it thrive. We will start from the ground and work upwards.
Where to Put the Plant
Peace lilies will tolerate most conditions other than full sun. These plants are native to the understory of thick jungles. This means they are used to filtered shade in a super moist environment. However, the sun is less intense further away from the equator, so peace lilies need some direct light in most parts of the U.S. to grow to their full potential.
The best possible place for a peace lily is a well-sealed, east-facing window in a humid area, such as a bathroom. Don’t place peace lilies near a drafty window, because any air below 55°F can kill off leaves. While your thermostat might be set at 67°F in the winter, the temperature next to a drafty, single-paned window could be much colder. This plant does best between 65°F and 80°F. If you live in an area with a climate between 60°F and 80°F for part of the year, consider putting your peace lily outside for these months.
Being jungle plants, peace lilies love moisture. The most humid places in homes tend to be the bathrooms and the kitchen. Don’t put peace lilies in a south or west-facing window. The direct, intense mid-day and afternoon sun will likely fry your plant. Peace lilies will also live in very low light conditions (such as a poorly-lit office), but they won’t flower or grow very fast. If you’re interested in more plants that grow in low light, check out this handy list.
Choosing a Pot and Soil for Your Peace Lily
In general, it is always best to give house plants pots with a drain hole at the bottom. If your plant is in a place with little light, it will perform less photosynthesis. This decreases the plant’s need for water, meaning the plant will draw less water from the soil. With no drain hole, the water will simply sit in the pot. If the soil is too wet for too long, the plant can get root rot. Let’s avoid that!
If you want to go the extra mile, put your peace lily pot on a saucer with gravel. Fill the saucer with water. This saucer creates a more humid environment for the peace lily as the water evaporates from the dish. Be sure that the bottom of the peace lily pot never touches the water in the saucer. This could cause the plant to get root rot, which we want to avoid! Top off the water in the gravel saucer often enough that it doesn’t dry out.
Peace lilies like well-drained soil that holds on to moisture. A good base for peace lilies is a peat moss soil. The peat moss retains water. If you have regular soil, add a small amount of vermiculite. This mineral will grab on to moisture and keep your plant properly moist. However, when you improve soil moisture, you should also improve soil drainage. To improve drainage, mix about 1/4 to 1/3 of perlite, coco coir, or sand into the soil.
Roots and Watering Your Peace Lily
Peace lilies prefer moderate watering. Unlike succulents and cacti, don’t let peace lilies dry out completely between watering. It is time to re-water when the top two inches of soil are dry. Don’t ever judge when a plant’s watering needs by how dry the top of the soil is. This topsoil dries out much faster than soil deeper in the pot. Most beginner houseplant growers chronically overwater their plants. As mentioned above, this will eventually lead to root rot and give fungi and pests more opportunities to harm the plant.
One technique to gauge soil moisture is to stick your finger deep into the soil to determine how wet the soil is a few inches below the surface. A less intrusive method is to pick up the pot. If the pot seems light, the plant needs water. If it seems heavy, hold off on watering. After a few months, you will know how heavy the pot typically is.
Frequently Take Note of the Peace Lily Leaves
First and foremost- get a spray bottle and set it next to your plant. Mist it every time you walk by and happen to think about it. This added humidity will help keep your lily quite happy. Second, pay attention to the leaves themselves. Leaf health is often the easiest way to determine how healthy a plant is.
Droopy Leaves
If the leaves droop more than usual and look wilted, water the plant immediately. Peace lilies can withstand drying out a few times, but chronic under watering will kill the plant.
Brown Leaf Tips
More often than not, brown leaf tips indicate too much light. If you notice brown leaf tips, move your peace lily to a slightly more shady spot in your house. If the plant is already in a place without much light, brown leaf tips can be caused by chemicals in the tap water. This plant is quite sensitive to any dissolved chemicals in your tap water. If you have this problem, use filtered water for your peace lily. Similarly, brown tips can be caused by over-fertilization. If you think this is the case, hold off on re-fertilizing the plant until the next spring.
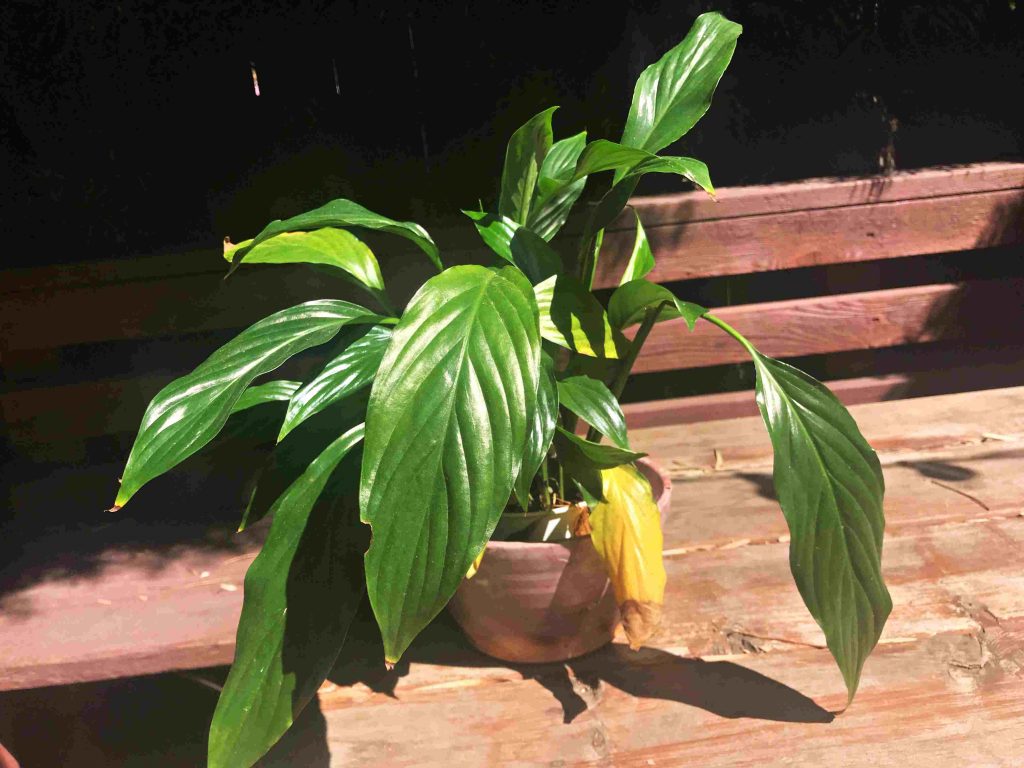
The author’s peace lily. He let the plant get drought-stressed, which caused some leaves to yellow.
Yellow Leaves
A yellow leaf can mean many things on a peace lily. The plant will naturally shed leaves at the base of the stem. If these leaves are the only ones turning yellow, don’t worry; your plant is fine. Other causes of yellow leaves include over watering, under watering, soil that’s too dry, soil that’s too wet, over-fertilized soil, too much sun, or infestation. Anything that stresses the plant out will cause the plant to turn leaves yellow. If you see yellow leaves, do some investigation to determine what might be stressing the plant out.
A yellow leaf on a peace lily will never return to being green. Remove any yellow leaves with sharp shears as close to the base of the leaf as possible. Removing yellow leaves will help prevent insect infestation. It will also help the plant focus all of its energy on productive, living leaves, rather than sending energy to save dying leaves.
Dusty Leaves
Over time, dust and particulates in the air will settle on the leaves of your peace lily. Every 6 months, wipe down the leaves with a very mild soapy water solution. Alternatively, place your plant in the sink and gently spray down the leaves with a spray option on your faucet.
Bugs
Fortunately, peace lilies are quite pest-resistant. However, if you notice bugs on the leaves of your peace lily, act quickly. First, use a q-tip dipped in alcohol to swab down any visible insects. This should kill the scale bugs and mealybugs that tend to infect peace lilies. Next, wipe down all leaves with a dilute solution of soapy water or neem oil and water to prevent recolonization by any remaining bugs. The most important tip I can give is to act quickly once you notice bugs. They only get worse! Bugs tend to affect overwatered plants. Cut back on the watering if you get an infestation.
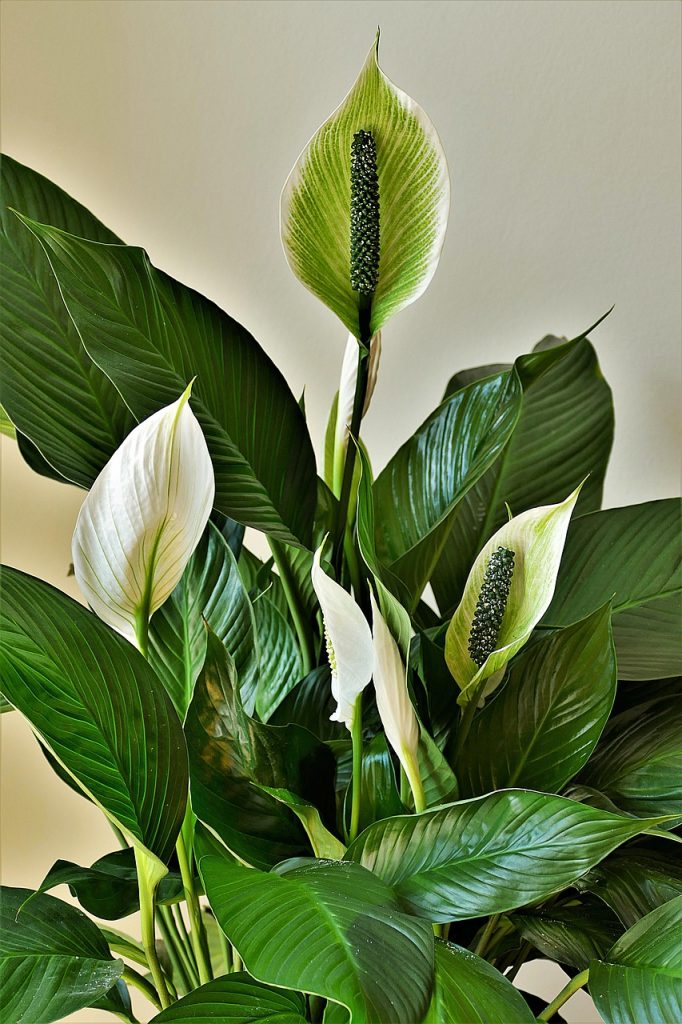
How Can I Get My Peace Lily to Flower?
Most plants will only flower if they are content in all other aspects of their lives. Peace lilies will never flower in a totally shady place. They need some direct sunlight to create enough energy to make flowers. They typically send up the first flowers in spring and will flower all the way through summer in ideal circumstances. The flowers typically last 3 to 6 weeks and turn green on their way out. When this happens, cut the flower at the very base of the stalk. In order to produce flowers, these plants need some, but not too much, fertilizer.
Fertilizer
These plants need potassium in the soil to create flowers. Feed the plants a 20-20-20 fertilizer at 1/4 to 1/2 strength every two months between spring and early fall. Full strength fertilizer is too intense for peace lilies. Don’t fertilize in the late fall or early winter, because the plant is mostly dormant. It won’t use these nutrients, so when it begins to grow in the spring the plant could be over-fertilized.
Don’t Be Worried, They Really Are Easy
While this guide might make peace lily care seem involved and difficult, it really isn’t. Once you have the right pot, right place, and right watering schedule, the plant will take care of itself. Even if you don’t do everything right, the peace lily will probably stay alive. Remember to mist the plant whenever the thought pops into your head. It’s really hard to over-mist a peace lily. Thoroughly water them about every 7-10 days in the summer and somewhat less frequently in the winter. Give them weak fertilizer once or twice in the spring and summer. With this maintenance, you are almost bound to have a healthy, beautiful, air-purifying peace lily!










My med-large peace lily developed black leaves over a year ago. I keep cutting out the black leaves but the plant is about 3-4″ now and even the new growth comes in black. I have transplanted it, there’s is no root rot. I have started to water it with distilled water. Is this plant salvageable? What is wrong??
I set my peace lily outside on my covered porch for the summer. Now yellow jackets have made a nest in the pot. How can I eliminate the yellow jackets without killing my peace lily? Help! Thank you.
What about transferring them to a larger pot? How often and how much bigger a pot should you use?